
Disclaimer: There are affiliate links in this post. At no cost to you, I get commissions for purchases made through these links.
Breast milk is one of the healthiest substances. This precious golden liquid is packed with nutrients to nourish a developing brain and help babies double in size in just a few months.
Breast milk is not only beneficial for infants through oral administration. Many studies indicate that it can also effectively treat topical skin problems.
So, many nursing moms have used leftover breast milk to create soaps, which are seen as a natural alternative to treating eczema in babies and even adults.
Then, how to make breast milk soap? Let’s read on to find out right now!
Benefits of Breast Milk Soap
Breast milk is a gift from God. Many of us even consider it liquid gold. Besides the benefits for the baby’s physical development, it is also beneficial for the baby’s sensitive skin by treating some skin diseases.
We all know that breast milk has powerful immune properties, but that’s not all.
There are many more beneficial ingredients found in this precious golden liquid, such as amino acids, proteins, enzymes, antibodies, probiotics, fatty acids, minerals, vitamins, and more. The list of nutrients goes on, and there are still things undiscovered.
This liquid is very gentle and nourishing to the skin, making it the perfect choice for treating eczema, conjunctivitis, and diaper dermatitis. In addition, it has almost no adverse side effects. So you can avoid unnecessary additives that hurt your baby’s sensitive skin.
Also, making soaps from breast milk allows you to customize it to your needs. In other words, it is possible to tailor what is in your soaps. It is excellent for those who have family members with skin conditions, as you can pick the ingredients that are best suited for your needs and health.
You will know what is going into your soaps. As a result, you can pick the most eco-friendly choices.

Cold Process Soap Vs. Melt and Pour Soap
When comparing these two soap-making recipes together, each has pros and cons. We will point out some things you consider when deciding which one is for you.
Adding Ingredients
The Cold Process will provide you with the most freedom when talking about adding ingredients,
You can add your milk to the Melt and Pour soap or additional additives that add so much liquid. However, adding milk or oils will affect the hardness of the final soap bars.
It does not mean you cannot add ingredients to the Melt and Pour soap. It is possible to add minimal amounts of colors, essential oils, and oils. But it will lock into specific amounts without using milk and honey.
Handling Lye
Generally, the handling of lye and toilet bowl cleaners is the same. Therefore, it is unnecessary to be scared of it if you do not touch it. Also, remember that there is no left lye after the soap-making process. So it can be considered a safe pick for making natural soap.
Yet, if your goal is to avoid lye altogether, you should choose the Melt and Pour soap. It contains lye that has been handled for you.
It is possible to melt it and put your color, herbs, and scent. After that, pour it into a lovely mold to gain designed soaps.
Friendly For Kid
In our opinion, Melt and Pour soaps are a perfect pick for your baby.
While Cold Process soaps deal with lye, their Melt and Pour counterpart is a good way for you to “make soap” through melting and pouring into cute molds.
Melt and Pour soaps have a shorter shelf life and are best stored in your fridge. Meanwhile, if you store Cold Process soaps in a place away from moisture and sunlight, they will have a shelf life of at least six months.
We prefer both methods for different reasons, although our favorite pick is Cold Process soap, partly because we like being able to control what goes into our soaps. On the other hand, we also love its texture and feel.
How to Make Soap from Breast Milk Without Lye?
Go for the Melt and Pour recipe if you want to make more kid-friendly breast milk soaps. This recipe below allows you to create around twelve teddy bear soap bars:
Tools List
- A sharp knife
- Pyrex measuring cup
- Whiskey
- Digital kitchen scale
- Double boiler/water bath/microwave
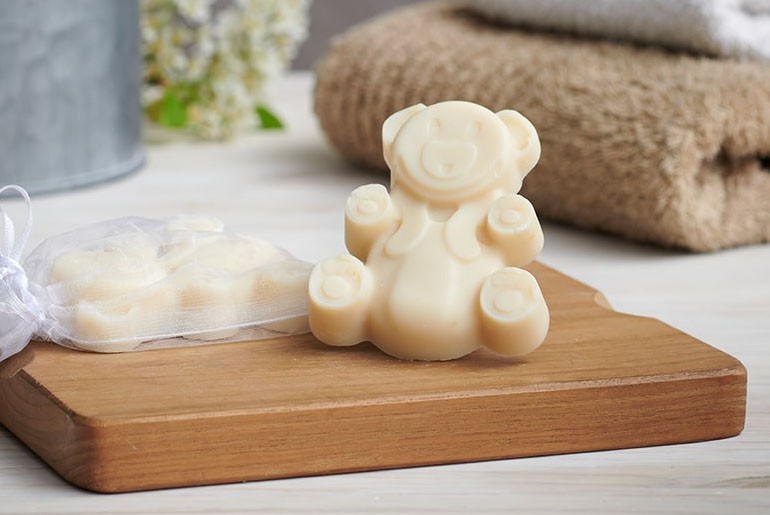
- Sunflower soap mold or teddy bear mold
- Rubbing Alcohol (put it in a spray bottle)
- Meat thermometer (optional)
Ingredients
- Shea butter or clear melt & pour soap bases – 200g or 7oz.
- Breast Milk – 150 ml (Room temperature).
- Ground oatmeal – 1 tablespoon (optional)
- Honey – 1/2 teaspoon (optional).
- Lavender essential oil or chamomile essential oil – 15 drops (optional)
Guide
Step 1: Use your knife to break the soap base into smaller pieces.
Step 2: Microwave your soap base for no less than 20 seconds and stir well after each burst. It is possible to melt your soap base in a water bath or double boiler at medium heat.
Step 3: Allow your soap base to cool down to about 55℃/130℉, so it can’t scorch your breastmilk.
Step 4: Add your breastmilk, and then stir
Step 5: If you use oatmeal and honey (optional), add them and whisk until there are no more clumps.
Step 6: Put essential oil, and then continue to stir.
Step 7. Place the soap mold on your cutting board. After that, pour the soap into your mold.
Step 8: Use rubbing alcohol to spritz the top to minimize sweating and air bubbles of your soap.
Step 9: Store it in your fridge for a few hours and allow it to harden and cool down.
Step 10: Next, unmold
Step 11: If you want to store it, put it in a ziplock bag and place it into your fridge for subsequent use.
Cold Process Breast Milk Soap Recipe
The Cold process will take longer to complete. In addition, it utilizes lye to preserve additives such as breast milk, which are easily spoiled.

Tools List
- Soap mold (silicone)
- Kitchen thermometer
- Immersion blender
- Kitchen scale to weigh ingredients
- Safety sear (Googles and gloves)
Ingredients
- Breast Milk (has frozen into ice cubes) – 10.5 oz
- Olive Oil – 32 oz
- Lye – 4.3 oz
- Topical Grade or baby-safe essential oil – 1.4 oz (optional)
Guide
Step 1: Put frozen breast milk into your stainless steel or plastic bowl (you should avoid using a glass one). After that, put the bowl into your ice bath.
This ice bath can keep your milk cold and avoid scorching when the lye is added.
Step 2: Pour the lye into your bowl with frozen breast milk. Add this solution very slowly to decrease the chance of your milk scorching.
Step 3: Stir continuously and evenly until the lye and breast milk are entirely dissolved. Then set this bowl aside.
Step 4: Heat your olive oil by placing it on the stove over your double boiler/in your microwave. Wait about 30 seconds until it reaches 100°.
Step 5: When the olive oil and lye solution are nearly at the same temperature, you need to pour your lye solution into your oil via a strainer.
Step 6: Utilizing an immersion blender to combine oils and lye solution until your mix reaches a trace.
Step 7: Pour the mixture into your silicone molds. Don’t forget to tap against the counter to remove air bubbles.
Step 8: Place this mold into your fridge and let it cool overnight.
Step 9: Leave your breast milk soaps at room temperature for at least twenty-four hours before cutting or unmolding.
Step 10: If your soaps have been unmolded, put them out onto greaseproof baking paper or parchment paper to store in a well-ventilated place away from direct light for at least six weeks.
This curing period lets any residual liquid evaporate and test your soap’s lather.

How to Add Oatmeal to Any Soap Recipe?
Oatmeal is a nutritious snack that delivers health benefits when eaten daily. It is good to eat oatmeal daily, considering its nutritional profile and health benefits, including heart-healthy effects and weight control.
Moreover, oatmeal is the perfect ingredient to add to homemade soap recipes. It is very gentle and can nourish dry skin conditions, such as psoriasis and eczema. Plus, it can moisturize, protect, exfoliate, and clean your skin.
It is essential to puree oatmeal if you want to bring out all its skin-beautifying properties. You need to add your oatmeal to your food processor or coffee grinder to puree it.
It is possible to crush your oats utilizing a rolling pin or mortar and pestle. Then, you can get an even, fine powder from your oatmeal. It is called colloidal oatmeal, and it is fantastic for soothing your skin.
Finally, just add this colloidal oatmeal to the recipes above.
FAQs
1. How Long Does Breast Milk Soap Last?
Breast milk soaps may last long, as your milk changes into lye before setting in your soap mold. As a result, you do not have to worry about your finished soaps going bad four hours out of your refrigerator like regular breast milk.
Most milk-based soaps have a shelf life of about five to ten years.
2. How to Store Breast Milk Soap?
We recommend storing your breastmilk soaps in a small zip-lock bag and storing them in the refrigerator. We recommend storing them in the freezer if you know you’re a long way from using these soaps.
When you use a milk soap bar, you need to make sure it dries completely between uses. The best thing is to put it in a dish of soap that drains well.
Once you notice your soaps turn darker or smelly, it’s time to throw them into the trash.
3. What Can I Put In My Breast Milk Soap?
Honey and oatmeal do not only make a perfect-tasting breakfast, but they also make soaps that will smell as good as it feels.
In addition to essential oils, you can also add olive oil to your breast milk soap. This oil helps create a lot of foam.
4. Is Breast Milk Soap Good for Your Face?
Yes. It may help control or prevent acne.
It contains ingredients that gently remove dead skin cells, which help you prevent acne by keeping your pores clear of dirt, excess oil, and sebum.
Furthermore, breastmilk soap is gentle and may help maintain the skin’s moisture. It will help the skin absorb the beneficial vitamins, fatty acids, and minerals without disrupting its natural balance.
Breastmilk soaps to cleanse your skin can treat acne and lower inflammation associated with pimples. Thanks to that, you will have clear and smooth skin.
5. Can You Sell Soap Made With Breast Milk?
Yes! Of course.
You need to make sure that your product is good and safe enough to make others willing to pay for your breast milk soaps.
The Bottom Line
Hopefully, by the end of this article, you’ll know what to do with leftover or frozen breast milk to avoid wasting this liquid gold after your baby has transitioned to solid foods.
We have covered two different methods for breastfeeding moms to make breastmilk soap, including the cold and the melt-and-pour processes. Both are perfect solutions for soap making with natural ingredients, including breastmilk.
It isn’t hard to do a homemade breast milk soap, and you can use them for a spa-like experience in the bath at the end of the day.
It is excellent, isn’t it? So try making your breastmilk soaps and let us know how great it is. Last but not least, let us know what you think in the comments!
Please share this article with other breastfeeding mothers!
Thank you for reading!


